Keep only the information the recipient needs. Cover identifying text, numbers, notifications, and codes with a fully opaque mask. Save a flattened copy, then zoom in on that saved file before sharing it.
A screenshot is convenient because it captures context. That same strength is the privacy risk: it also captures account labels, status bars, notifications, and details near the edge that you were not thinking about when you pressed the buttons.
What to redact in a screenshot
1. Names and contact information
Start with full names, mailing addresses, phone numbers, and email addresses. Look in profile headers, shipping sections, signatures, account menus, and quoted messages, not only in the main content.
2. Usernames, membership IDs, and order numbers
A username does not have to be a legal name to identify someone. Reused handles can connect accounts across services. Order, booking, case, and membership numbers may also help someone look up information or impersonate the account holder.
3. QR codes, barcodes, and invitation links
Codes can contain a URL, ticket, account token, or reference number even when the human-readable text looks harmless. Cover the full code and its quiet border rather than drawing over only the center.
4. Notifications and status information
A notification banner can reveal a sender, message preview, workplace, or appointment. Review the top and bottom edges of the screenshot, including app icons and labels from other services.
5. Location and routine clues
A map pin, nearby store, commute time, or timestamp may reveal a home area or daily pattern when combined with the post. Crop irrelevant areas and mask location details that the recipient does not need.
Three rules for a safer redaction
General photo editors often make you choose a color, tool, size, and opacity before you can hide one line. You may then draw accidentally while trying to zoom. The settings are not merely inconvenient: choosing a translucent highlighter can leave the original characters visible.
- Use an opaque fill. A dark highlighter is still unsafe if pixels from the text show through.
- Cover a little beyond the characters. Include shadows, antialiasing, and the full length of the field.
- Verify the saved copy. Open the exported image and zoom in. Do not rely only on the editor preview.
Saving a redacted copy does not remove private information from the original photo. When you share, verify that you selected the new, redacted image.
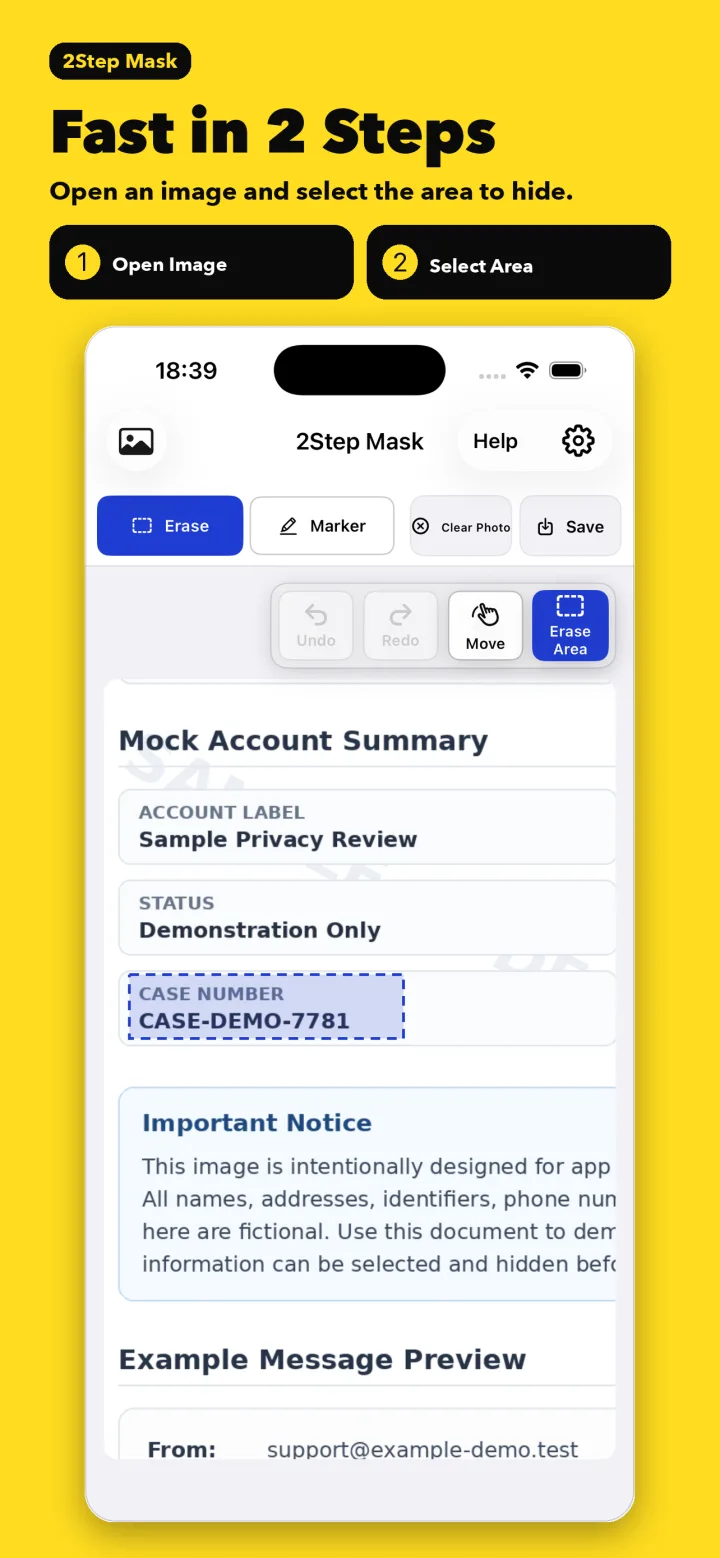
A fast workflow in 2Step Mask
Area Mask is selected as soon as the photo opens. That removes the color and tool setup from the first action. Move is a separate mode, so a drag used to reposition a zoomed image does not add paint.
- Open the screenshot in 2Step Mask.
- Drag over each field you want to hide.
- Pinch to zoom, then use Move to inspect another area.
- For a specific color, switch to Marker and use the eyedropper, palette, history, or favorites.
- Save a copy and inspect it before sharing.
Before-you-share checklist
- No name, address, phone number, or email remains
- Usernames, account IDs, case numbers, and order numbers are checked
- QR codes and barcodes are covered completely
- Notifications and screen edges have been reviewed
- The saved copy is unreadable when enlarged
- The selected attachment is the redacted copy, not the original
Frequently asked questions
Can I use the built-in iPhone Markup tools?
You can cover text with a fully opaque tool, but avoid a translucent highlighter and always inspect the saved result. A redaction-focused app reduces the number of opacity and tool choices that can go wrong.
Is blur or pixelation safer than a solid mask?
A weak blur or large pixel blocks may preserve recognizable character shapes. For small text, a fully opaque mask that covers the entire field is easier to verify visually.
Redact personal information in two quick steps
Open the screenshot, then drag over what you want to hide. Processing stays on your iPhone.
View on the App Store